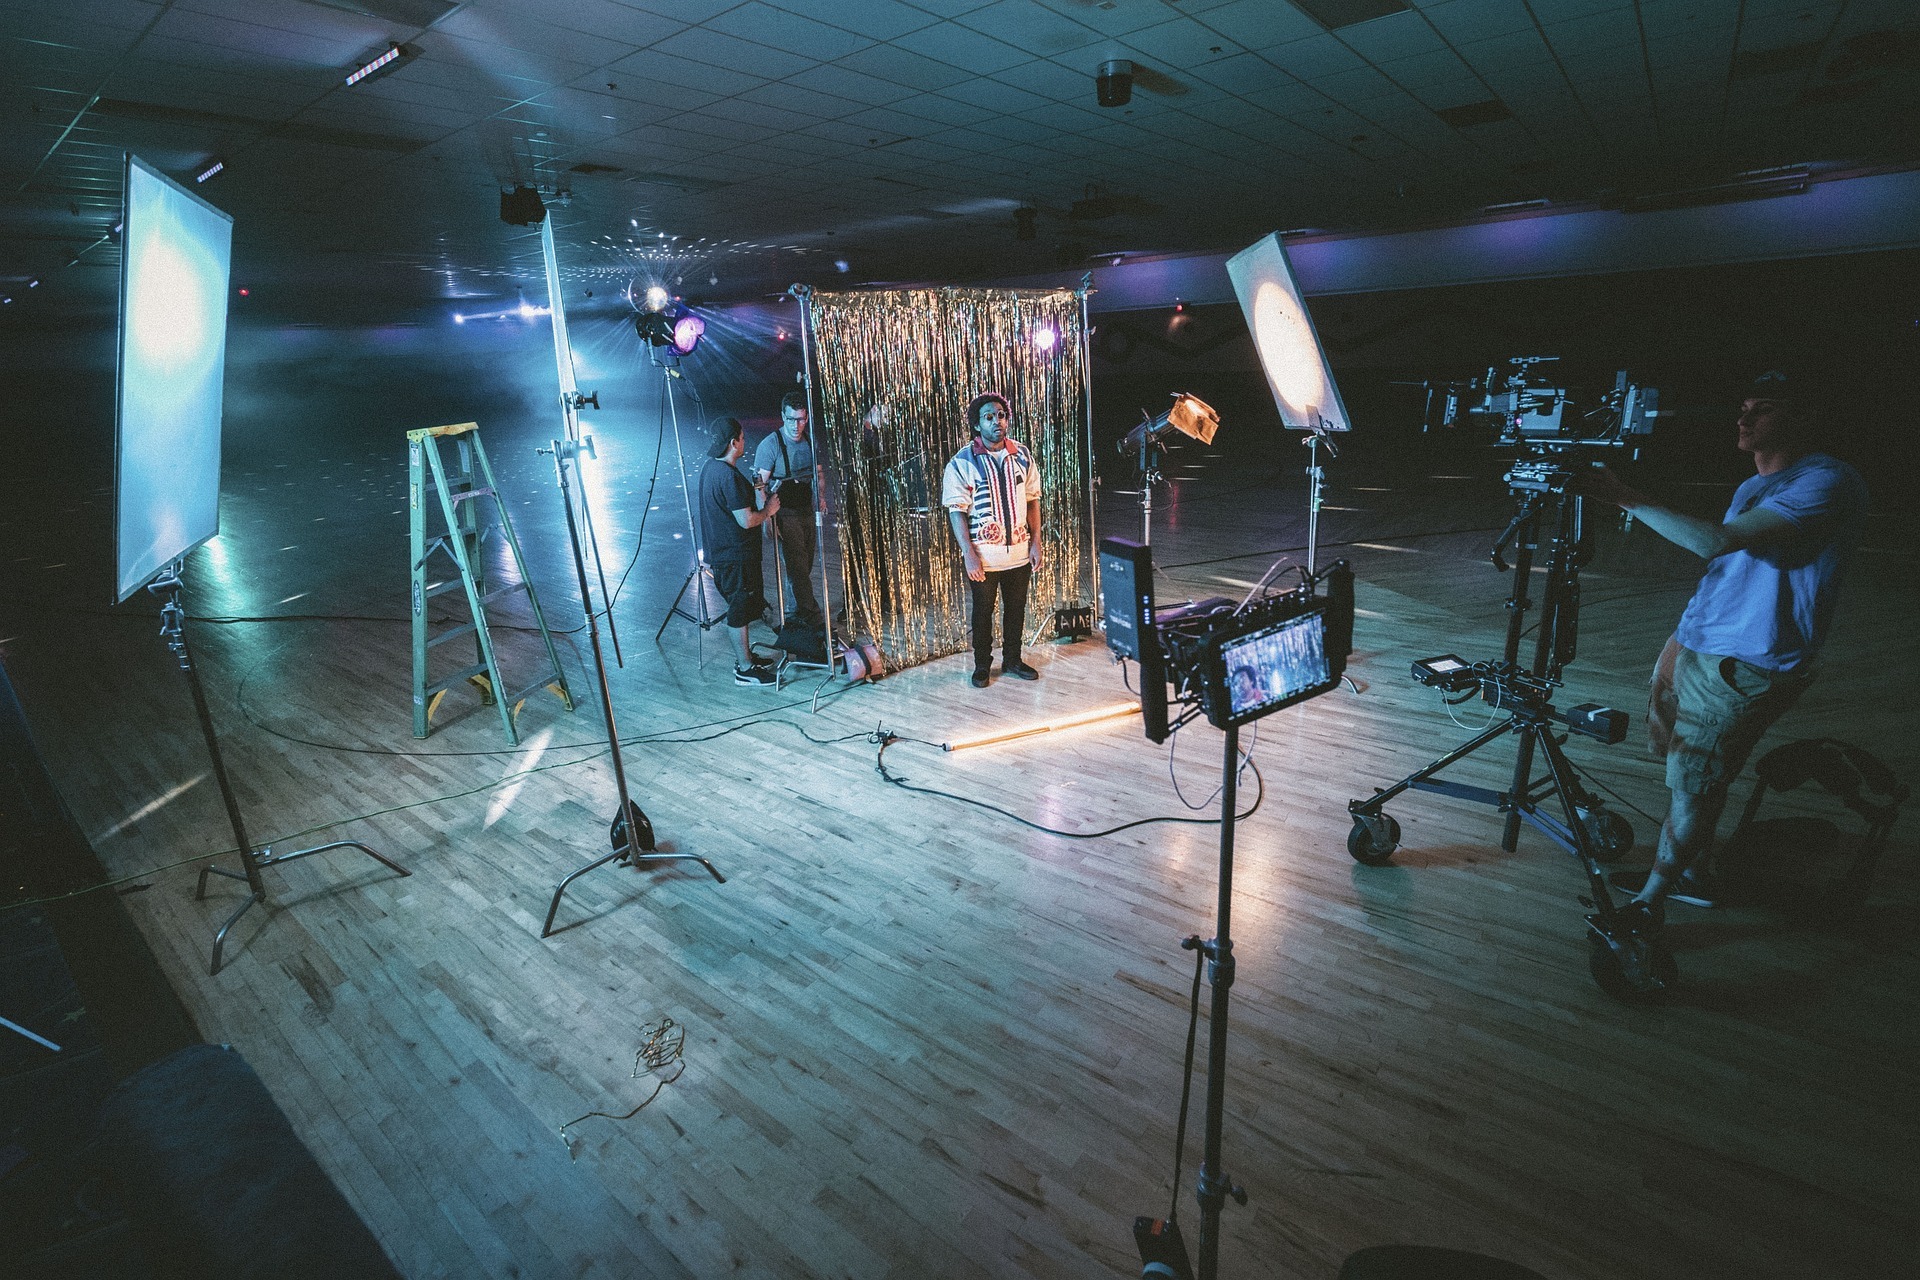
Making videos of your performances is a fantastic method to reach a bigger audience and spread your work. The quality of your footage depends on more than just your camera; lighting plays a major role as well. In contrast to well-lit performances, those filmed in poorly-lit rooms would look unprofessional and unpleasant at best. Position, color correction, backlighting, and other lighting-related considerations for recording your performances will be discussed. The quality of your performance films can be significantly improved by learning to use lighting effectively, whether you’re a musician, dancer, or actor.
Use Bright, Even Lighting
If you want to capture the most outstanding shots of your performances, you must have bright, even lighting. If the lights are too low for the movie being shown, it can be difficult to see what is going on stage. Unwanted shadows or overexposure might result from overly bright or uneven lighting, giving your film an amateurish image.
View this post on Instagram
Achieve High-Contrast Lighting
To achieve uniform, high-contrast lighting, use multiple lights, such as stage lights or studio lights. The stage and surrounding area must be suitably lighted, and the lighting must be equally distributed. This could be accomplished by strategically positioning multiple light sources at varied angles to create the illusion of homogeneous lighting.
Tweak on Color Temperature
In addition to the brightness and homogeneity of the illumination, the color temperature of the bulbs should be examined. The color temperature of the lights you utilize may have an effect on the appearance of your film. Cool-toned lighting, such as fluorescent tubes, can generate a blue, clinical environment, but warm-toned lighting can provide a more pleasant, natural feel. You can set the perfect mood and ambiance for your performance by precisely adjusting the color temperature of the lighting.
Position the Lighting Correctly
While setting your lighting, keep the angle at which the lights are focused toward your subject in mind. Instead of casting harsh, unpleasant shadows, aim for an angle that emphasizes the curves of your performance area and your subject. Consider using lighting sources that can be directed and adjusted, such as directional spotlights or softbox lights, to accomplish this.
Aside from the angle, the distance between your subject and the lights might have an effect on the quality of your footage. Putting the lights too close to your subject will result in a harsh, overexposed look while placing them too far away will result in a dark, underexposed look. Experiment with various distances and angles to discover the sweet spot that produces the desired effect for your performance.
Off-Axis Lighting
Lights placed out to the side or at an angle to your subject can add depth and texture. Straight frontal lighting has the potential to make performers appear flat and uninteresting. By angling the lights, you can generate more dynamic shadows and highlights, making your performers stand out.
Place Lights at Different Heights
Using lights at various heights might assist in adding depth to your footage. This is especially true for performances that include movement or dancing. If all the lights are the same height, the performers may appear flat and lack dynamic movement. Positioning lights at different heights may make more interesting and dramatic shadows.
The Three-Point Lighting
The tried-and-true method of three-point lighting is a video production standard for a reason: it produces consistently high-quality results every time. The method involves the employment of three lights, all positioned in different ways around the performer, to produce a well-balanced and aesthetically pleasing light pattern.
1. Key Light
In three-point lighting, the key light is the brightest of the three lights. The key light generates the primary light source on the performer’s face or body, emphasizing and defining facial characteristics. Typically, the key light will be angled 45 degrees from the camera and directed down from above the performer’s head.
With three-point lighting, the placement and strength of the primary light are crucial factors in determining the final aesthetic of the video. The proper positioning of the key light allows it to do wonders for the performance, the scene, and the audience’s experience.
View this post on Instagram
2. Fill Light
When using a three-point lighting setup, the fill light is essential because it eliminates any remaining shadows left by the primary light. It is placed at a 45-degree angle on the opposite side of the camera from the key light. The major function of the fill light is to mitigate the key light’s shadows and achieve a more even and natural illumination.
It is the job of the fill light, which is normally dimmer than the key light, to evenly illuminate the scene. The performer’s face or body flaws can be concealed, and harsh shadows can be diffused for a more polished appearance.
3. Backlight
The third component of three-point lighting is the backlight, whose major function is to differentiate the foreground and backdrop of the performer. In most cases, it will be angled at 45 degrees from the camera and placed just behind and above the performer. The backlight, the weakest of the three, creates a halo around the performer, setting them off from the background and giving the scene more dimension.
Depending on the strength and location of the backlight, it can also contribute to the scene’s feeling of drama and atmosphere. The finished video’s aesthetic can be drastically altered by where the backlight is placed. Try out various heights and perspectives to determine what works best for the performance.
For a natural appearance, the backlight should be dimmer than the key and fill lights, but all three should be evenly spaced. Control the brightness by using dimmers or moving the light source farther or closer to the stage.
View this post on Instagram
Try the Loop Lighting Technique
Portrait photographers can achieve a gentle, natural look using a technique called loop lighting. This style of directed lighting is achieved by placing the key light off to one side of the performer’s face so that a small shadow is cast on the opposite side of the nose.
If you want to use the loop lighting technique, the key light should be set at an angle of 30 to 45 degrees to the side of the performer’s face. This will cast a tiny, loop-shaped shadow across the bridge of the nose.
Similar to how a fill light is used in three-point lighting, it eliminates shadows cast by the primary light. Fill lighting should be placed at a 45-degree angle to the performer, opposite the key lighting.
It’s important to get the lighting just right so everything looks natural. The fill light shouldn’t be as intense as the key light, but it must still be powerful enough to eliminate any remaining shadows.
View this post on Instagram
Choosing the Correct Light Temperature
Getting the lighting just right is essential when filming live events. If the lighting and camera temperature are off, the video will look unprofessional.
The first step in adjusting your lighting is to learn about light temperature. The color of light is referred to as its Kelvin (K) temperature. Milder, more yellowish light is generated at lower temperatures, whereas cooler, bluer light is generated at higher ones.
Daylight, tungsten, and fluorescent are the three primary choices for video lighting. The daylight setting, with a temperature of roughly 5500K, is the most neutral of the three, simulating the appearance of sunlight outside. Tungsten, with a temperature of about 3200K, casts a warmer, more yellow light commonly used inside. The cool, blue-green light produced by fluorescent bulbs, with a temperature of roughly 4000K, is popular in professional and business settings.
Thinking about the environment where you’ll be performing will help you select the ideal light temperature for your video. If you plan on spending the day outside, you should dress for the weather. The tungsten temperature setting is a good option if you’ll be performing indoors and want to create a warm, inviting environment for your audience. Fluorescent lighting may be the most practical choice for an indoor, commercial environment.
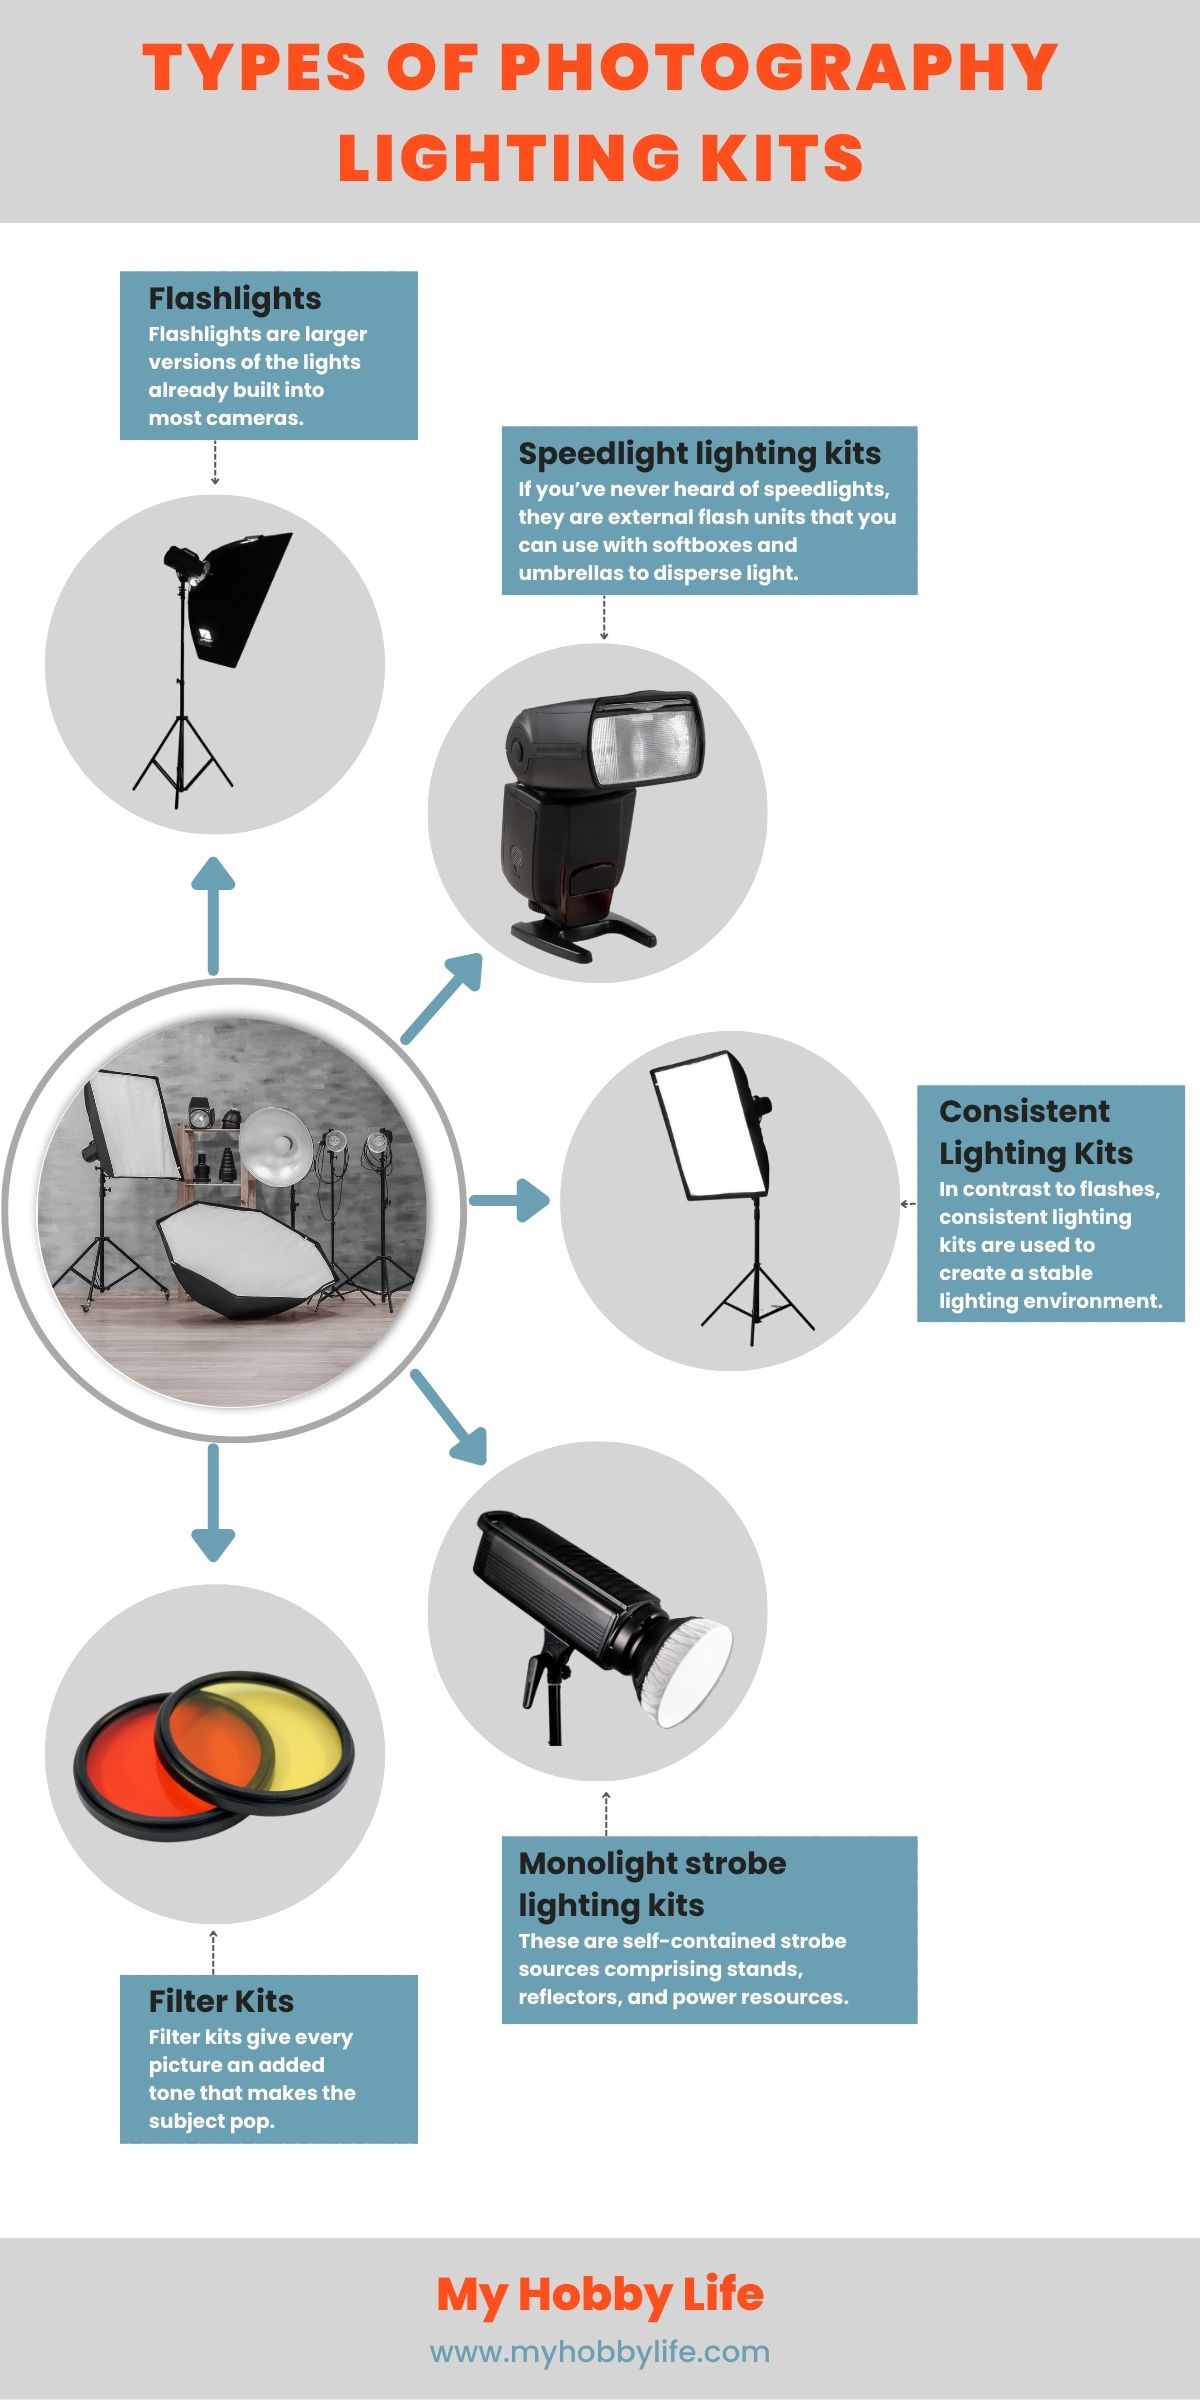
Types of Photography Lighting Kits
Light is crucial to photography. Their essence is made feasible by light reflecting off a subject and reacting on a strip of processed film. Although digital technology has eliminated the need for celluloid film, the essence of photography remains: excellent light generates good photos.
If you try to photograph in a dark room, the results will be dim and smeared. Because there isn’t enough light, the camera can’t see what it’s aiming at. The image will be hazy and indistinct if there is no good light source. Unfortunately, turning on a light bulb is not sufficient. Many household lights require more electricity to produce a clean image.
Lighting kits are exactly what their name implies: they are collections of equipment used by photographers to produce the ideal lighting for their images. If the concept is unfamiliar to you, you will be aware of it in some way. Consider a photo shoot with a giant white screen and lighting mounted on tripods.
Moreover, a lighting kit can be as simple or complicated as the photographer wants. Many kinds of tools are used in lighting kids, from a single lamp to more specialized items such as light boxes and umbrellas. Everything serves its purpose and is chosen for a reason.
In conclusion, if you are an artist trying to extend your audience through recordings of your performances, it is critical to have high-quality footage that successfully highlights your work. Lighting has a critical part in the quality of your video, from Kodak vintage video cameras to modern digital cameras, and there are various strategies you can employ to generate bright, even and high-contrast lighting. You will be able to reach a broader audience and successfully display your skill if you master these lighting approaches.


